



Adding Responsive Tooltips That Work on Mobile Devices | Experience Community
Skip to main content

Adding Responsive Tooltips That Work on Mobile Devices

  • Aug 26, 2022 4:28 PM UTC
  • 6 replies
  • 3823 views

jflowers1
Level 4 ●●●●
Forum|alt.badge.img+36

I am trying to add mobile-friendly tooltips using the following instructions: https://osvaldas.info/elegant-css-and-jquery-tooltip-responsive-mobile-friendly
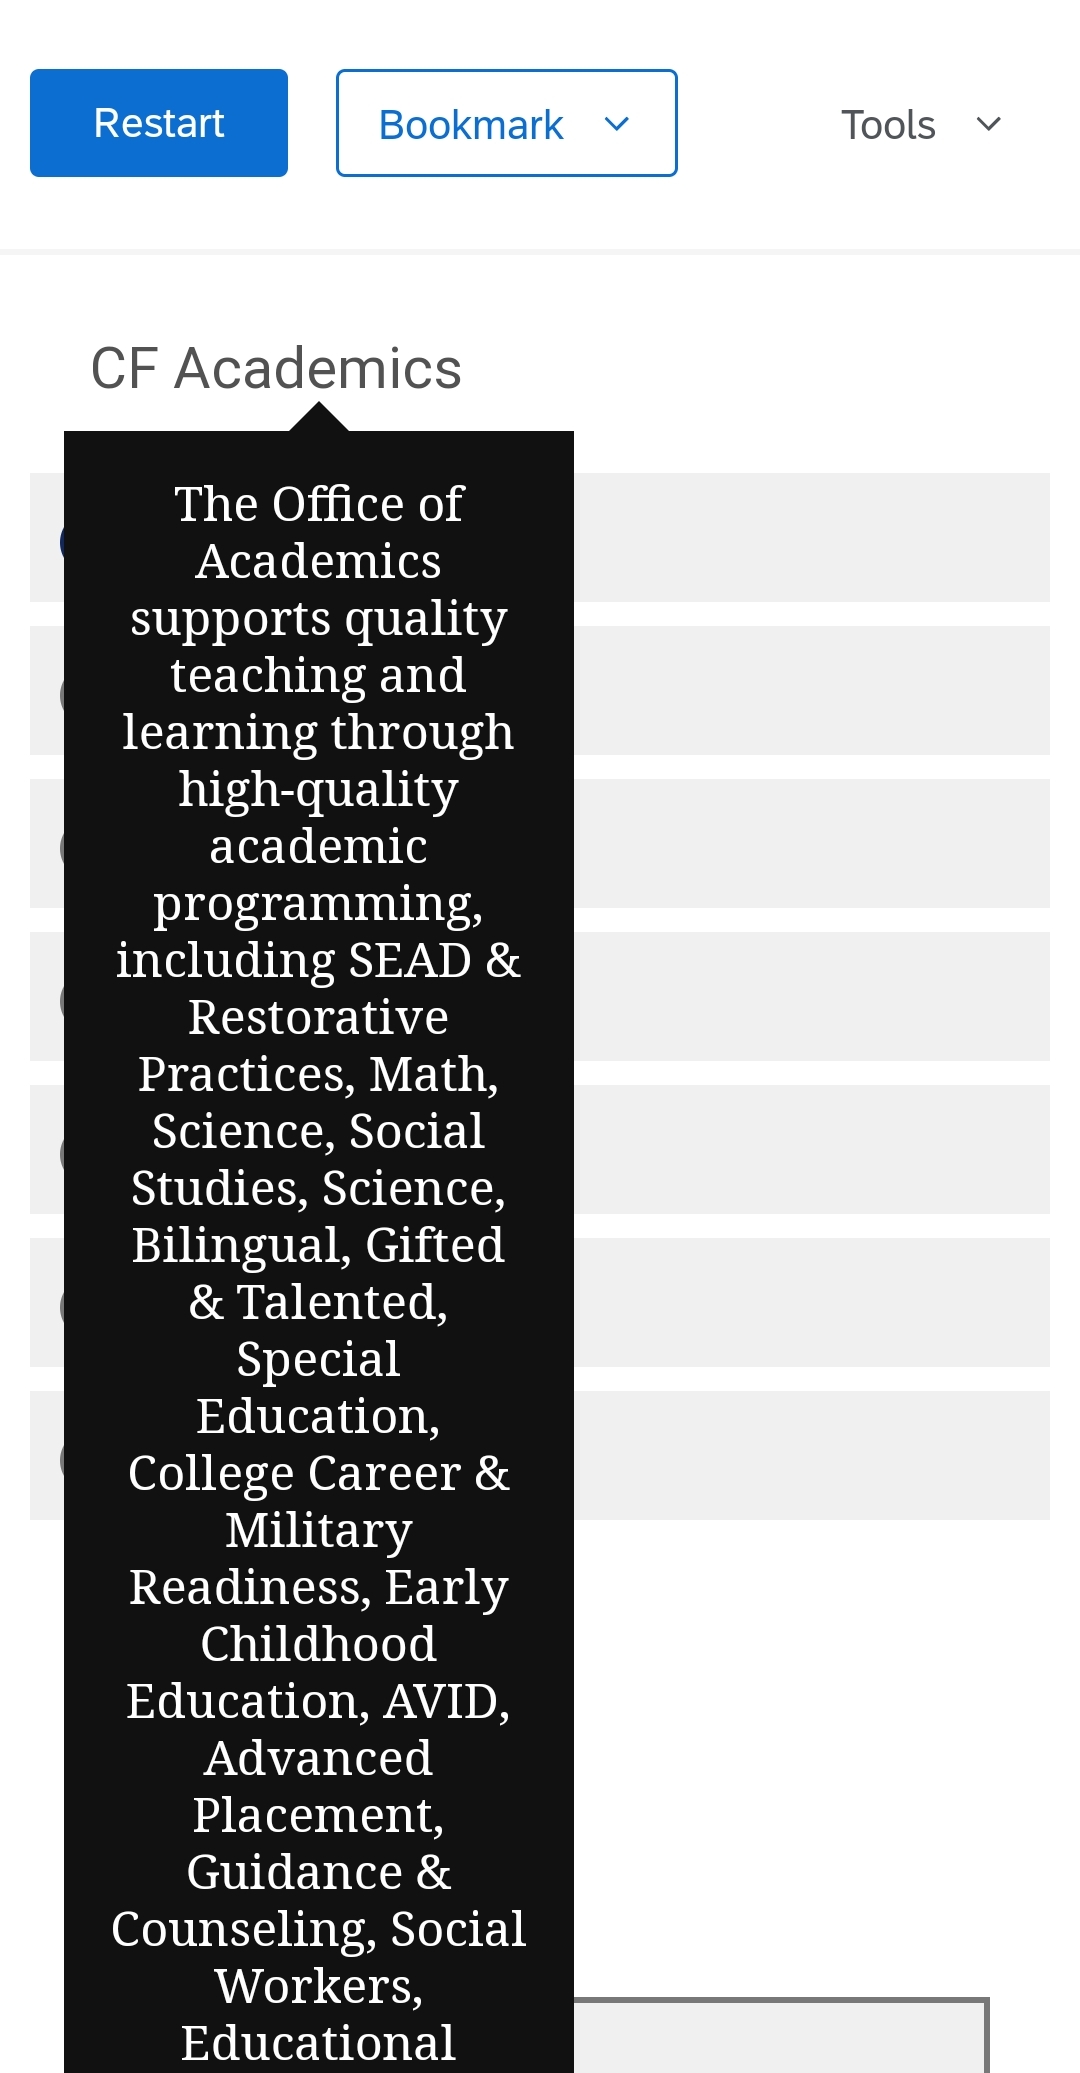
It is working fine on my desktop, but I can't get it to work on mobile devices. I've looked through every community post I could find that uses these instructions and I can't figure out what I'm doing wrong.
Here is what I've added to the Custom CSS Editor under Look and Feel:
#tooltip
{
    text-align: center;
    color: #fff;
    background: #111;
    position: absolute;
    z-index: 100;
    padding: 15px;
}
 
    #tooltip:after /* triangle decoration */
    {
        width: 0;
        height: 0;
        border-left: 10px solid transparent;
        border-right: 10px solid transparent;
        border-top: 10px solid #111;
        content: '';
        position: absolute;
        left: 50%;
        bottom: -10px;
        margin-left: -10px;
    }
 
        #tooltip.top:after
        {
            border-top-color: transparent;
            border-bottom: 10px solid #111;
            top: -20px;
            bottom: auto;
        }
 
        #tooltip.left:after
        {
            left: 10px;
            margin: 0;
        }
 
        #tooltip.right:after
        {
            right: 10px;
            left: auto;
            margin: 0;
        }

In the Edit Question JavaScript section for the question in which I'd like to add the tooltips, I've added the following JS in the onReady section (any instances of $ have been replaced with jQuery):
Qualtrics.SurveyEngine.addOnReady(function()
{
jQuery( function()
{
    var targets = jQuery( '[rel~=tooltip]' ),
        target  = false,
        tooltip = false,
        title   = false;
 
    targets.bind( 'mouseenter', function()
    {
        target  = jQuery( this );
        tip     = target.attr( 'title' );
        tooltip = jQuery( '

' );
 
        if( !tip || tip == '' )
            return false;
 
        target.removeAttr( 'title' );
        tooltip.css( 'opacity', 0 )
               .html( tip )
               .appendTo( 'body' );
 
        var init_tooltip = function()
        {
            if( jQuery( window ).width() < tooltip.outerWidth() * 1.5 )
                tooltip.css( 'max-width', jQuery( window ).width() / 2 );
            else
                tooltip.css( 'max-width', 340 );
 
            var pos_left = target.offset().left + ( target.outerWidth() / 2 ) - ( tooltip.outerWidth() / 2 ),
                pos_top  = target.offset().top - tooltip.outerHeight() - 20;
 
            if( pos_left < 0 )
            {
                pos_left = target.offset().left + target.outerWidth() / 2 - 20;
                tooltip.addClass( 'left' );
            }
            else
                tooltip.removeClass( 'left' );
 
            if( pos_left + tooltip.outerWidth() > jQuery( window ).width() )
            {
                pos_left = target.offset().left - tooltip.outerWidth() + target.outerWidth() / 2 + 20;
                tooltip.addClass( 'right' );
            }
            else
                tooltip.removeClass( 'right' );
 
            if( pos_top < 0 )
            {
                var pos_top  = target.offset().top + target.outerHeight();
                tooltip.addClass( 'top' );
            }
            else
                tooltip.removeClass( 'top' );
 
            tooltip.css( { left: pos_left, top: pos_top } )
                   .animate( { top: '+=10', opacity: 1 }, 50 );
        };
 
        init_tooltip();
        jQuery( window ).resize( init_tooltip );
 
        var remove_tooltip = function()
        {
            tooltip.animate( { top: '-=10', opacity: 0 }, 50, function()
            {
                jQuery( this ).remove();
            });
 
            target.attr( 'title', tip );
        };
 
        target.bind( 'mouseleave', remove_tooltip );
        tooltip.bind( 'click', remove_tooltip );
    });
});


});

I've added the following into the Source section of the Rich Content Editor for the answer choice to which I'm adding the tooltip:
Academics


6 replies

Deepak
QPN Level 8 ●●●●●●●●
Forum|alt.badge.img+48
  • Aug 26, 2022 5:36 PM UTC

Hello jflowers1
I added the same code and was able to view the tooltip on mobile. Adding the screenshot below. Not sure where you went wrong.
Screenshot_2022-08-26-22-57-46-69_40deb401b9ffe8e1df2f1cc5ba480b12.jpg


Tom_1842
Level 8 ●●●●●●●●
Forum|alt.badge.img+28
  • Level 8 ●●●●●●●●
  • Aug 26, 2022 6:14 PM UTC

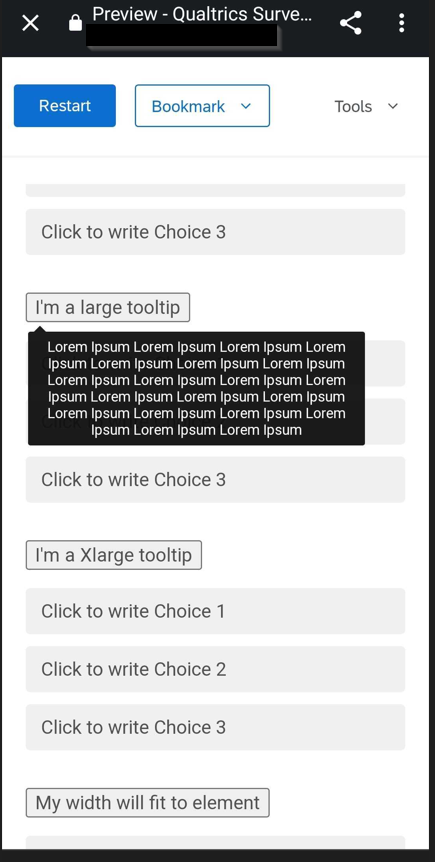
Hi there, I was also able to get the hover text to display on mobile with the code you posted. I have also used a purely CSS+Html tooltip solution before that I liked. I found it here. Options for small, medium, large, xlarge, and fit to element tooltips. Displays as a button to press which I liked for mobile. QSF below if interested.
MobileToolTip.pngHoverText_Different_Sizes.qsf


Forum|alt.badge.img+2
  • Level 2 ●●
  • Jul 4, 2023 3:48 AM UTC

Hello, I had to download jquery for it to work. Kate 


Forum|alt.badge.img+1

Where can I find the code that gave the result displayed, ​@Tom_1842 ? I thought there is a link under HoverText_Different_Sizes.qsf but there isn’t sadly.


Tom_1842
Level 8 ●●●●●●●●
Forum|alt.badge.img+28
  • Level 8 ●●●●●●●●
  • Nov 9, 2026 11:45 PM UTC

Hi ​@SomeoneTryingTobeGoodinQ , my previous post was affected by the community migration a while back. I've attached that QSF below, but I also recommend checking out the other attachment. It contains a responsive tooltip that works on mobile devices in the New Survey Taking Experience without jQuery. You can try it here:

NSTE Mobile Tooltip

In both examples, edit the tooltip content using the Rich Content Editor's Source ("<>") view.


Forum|alt.badge.img+1

Amazing, thanks a bunch! 

While you had written, I made my own version, and I’d like to share it, too: 

LINK TO PREVIEW

In the question, in HTML view use it like this: 

&hellip; question text&nbsp;<button aria-expanded="false" class="info-btn" data-info="[b]Bolded text[/b] visible when clicking info." type="button">Info</button>


In the header (of the survey, under look & feel) set: 

 <!-- // For TOOLTIPS: -->
<script>
(function() {
var tip = null, owner = null;
// Turns "[b]bold[/b] [i]italic[/i] [br]" into safe DOM nodes (no innerHTML)
function renderMarkup(text, parent) {
var parts = text.split(/(\[\/?b\]|\[\/?i\]|\[br\])/i);
var bold = false, italic = false;
parts.forEach(function(part) {
var p = part.toLowerCase();
if (p === '[b]') bold = true;
else if (p === '[/b]') bold = false;
else if (p === '[i]') italic = true;
else if (p === '[/i]') italic = false;
else if (p === '[br]') parent.appendChild(document.createElement('br'));
else if (part !== '') {
var node = document.createTextNode(part);
if (italic) { var i = document.createElement('em'); i.appendChild(node); node = i; }
if (bold) { var b = document.createElement('strong'); b.appendChild(node); node = b; }
parent.appendChild(node);
}
});
}
function close() {
if (tip) { tip.remove(); tip = null; }
if (owner) {
owner.setAttribute('aria-expanded', 'false');
owner.removeAttribute('aria-describedby');
owner = null;
}
}

function open(btn) {
close();
tip = document.createElement('div');
tip.className = 'info-tip';
tip.id = 'info-tip';
tip.setAttribute('role', 'tooltip');
renderMarkup(btn.getAttribute('data-info') || '', tip);

// Use the same font as the survey theme
var skin = btn.closest('.Skin') || document.body;
tip.style.fontFamily = window.getComputedStyle(skin).fontFamily;

document.body.appendChild(tip);

btn.setAttribute('aria-expanded', 'true');
btn.setAttribute('aria-describedby', 'info-tip');
owner = btn;

var r = btn.getBoundingClientRect();
var w = tip.offsetWidth, h = tip.offsetHeight;
var left = r.left + r.width / 2 - w / 2;
left = Math.max(8, Math.min(left, document.documentElement.clientWidth - w - 8));
var top = r.top - h - 8;
if (top < 8) top = r.bottom + 8;

tip.style.left = (left + window.pageXOffset) + 'px';
tip.style.top = (top + window.pageYOffset) + 'px';
}

document.addEventListener('click', function(e) {
var btn = e.target.closest && e.target.closest('.info-btn');
if (!btn) return;
e.preventDefault();
if (owner === btn) close(); else open(btn);
});

document.addEventListener('pointerdown', function(e) {
if (!tip) return;
if (e.target.closest('.info-tip') || e.target.closest('.info-btn')) return;
close();
});

document.addEventListener('keydown', function(e) { if (e.key === 'Escape') close(); });
window.addEventListener('resize', close);
})();
</script>


And for my personal design, set this in the look and feel under the custom CSS:

.info-tip {
position: absolute;
z-index: 99999;
max-width: 320px;
box-sizing: border-box;
background: #ffffff;
color: #525252;
border: 1px solid #817f84;
border-radius: 6px;
padding: 10px 12px;
box-shadow: 0 2px 8px rgba(0, 0, 0, 0.25);
font-size: 16px;
line-height: 1.4;
text-align: left;
}